

The Renamel composite system
Dr. Matt Parson breaks down the different types of Renamel composites and the importance of following the correct procedures when using them.
With the use of composite becoming more prominent in restorative dentistry, it not only becomes a necessity to be aware of the different types available at hand, but also gain an understanding of the distinct characteristics which make them suitable for specific uses.
Broadly speaking, there are three different types of composite:
- Microfilled composite
- Hybrid composite
- Nanofilled composite
What characteristics do they have?
Microfilled composites tend to have much easier handling characteristics and hold up polish for longer, making for long-lasting aesthetic results. However, they are not as strong from a tensile strength point of view and are much more prone to fracture. On the other hand, hybrid composites are stronger. This makes them more suitable for lower incisors, palatal aspects of upper incisors, posterior teeth, etc. This comes with a trade-off, however. What you gain from its strength and fracture resistance is traded with its limitations of aesthetic, meaning they’re not as polish-able. Even if you spend a significant amount of time during treatment focusing on the final polish, they will gradually dull overtime, unlike a microfill.
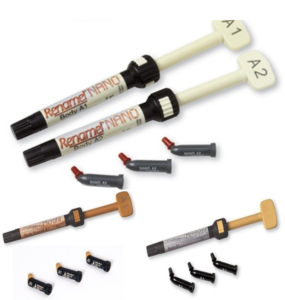
Renamel composite system
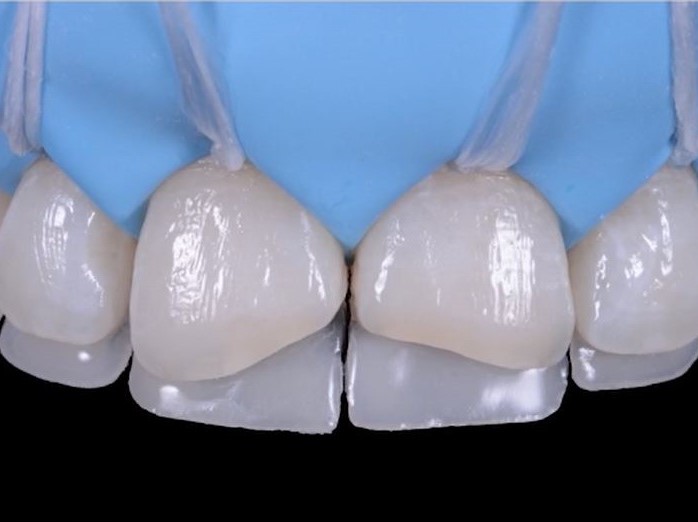
With the Renamel composite system you have access to nano-hybrid, micro-hybrid as well as the true microfill composite. The beauty with this tool kit is that you have a few different types of composites that you can utilise in any situation. They are all built around the same shade system, so whether its an A1 micro hybrid, nano hybrid or an A1 microfill, you will be sure to have an option for your particular case. For example, if you’re doing a class four restoration in shade A1, you may decide to use A1 micro hybrid or nano hybrid for your palatal shelf to achieve strength and longevity. But as we mentioned, there is a trade-off and you will compromise the aesthetics when using these materials alone.

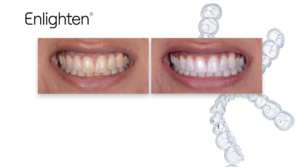
Polished vs unpolished teeth
In order to get the best of both worlds, you can combine this with A1 microfill over the labial aspect and still retain a polished look. The restoration will be durable enough that the patient will not experience fractures every six months, and you’ll still maintain a long-lasting shine with the aid of the microfill. So, when you see a patient for their 6 or 12 month check-up, it’s unlikely that you’ll see dimming or dulling of teeth.
My experience with the Renamel system
I have been using the Renamel system for the past 13 months, and when patients return for their check-ups, I expect to have to refine the existing restorations and reapply polish to bring the teeth back to their original state.
It’s not all about the show biz before and after photos
But in numerous cases, I have been surprised by how well some restorations have held up and don’t require any additional work. As a dentist, it’s reassuring to know that by having these different types of composites at your disposal, you’re able to produce predictable results which will not just please the patient as they leave the chair, but also look great 12 months down the line. It’s important to have such confidence in the longevity of your results as it doesn’t come cheap for patients, and sometimes, it’s not all about the show biz before and after photos.
Some tips
One of my biggest takeaways from doing edge bonding and composite veneers is to not jump the gun. Keep in mind that it’s often a long appointment for both you and the patient and there’s a possibility that some aspects won’t go according to plan. You may find that patient is struggling to keep their mouth open and feeling uneasy, a light bulb has gone off and it’s darker than you’d like it to be in the surgery, or any other distractions which can increase your stress levels. Subconsciously, this can cause you to rush the procedure and overlook some critical steps. It’s important to note that once you have cured the composite layer, although you’re still able to change the gross shape of the material, it becomes increasingly difficult to make subtle amendments.
Lets look at line angles
Once you tuck in a line angle you may realise that you have gone too far and decide to nudge it out a little bit and bring it back in until you find the perfect finish. If you are doing this with a brush whilst the composite remains wet, you’re always able to go back and forth until you get it just right before curing it in the final position. But if you decide to cure the composite prematurely before the finer details are implemented and rely on the help of discs to correct them at a later stage, your job will become a lot more difficult.
With the discs you can only go in one direction; you can only remove composite, and if you remove too much of it, you’ll have to resort to using a sand blaster to add it back on.
The take away
The lesson here is to be patient in those earlier stages and be meticulous about the details. As tempting as it may be to cure the composite at an earlier stage to save yourself a few minutes, it greatly limits the margin for error, and in fact, it can potentially lengthen the procedure by 15 to 20 minutes if any mistakes are made.
Tools you can use to perfect and refine rather than letting them define the shape of your composite
You should take your time with the paint brush and the carvers to do the majority of the work and this will make your life a lot easier. Look at discs and rubber dams as tools you can use to perfect and refine rather than letting them define the shape of your composite.
Ultimately, as restorative dentists, we want to help our patients. Our goal is to provide minimally invasive treatments that help people be happier and more confident in their smiles. The more confident we are in providing these treatments, the more cases we will do and the more patients we can help. In order to become confident in doing treatments, we must forgot that fear of things going wrong. Take your time in the beginning and build up your skill set. Going on courses and learning from lecturers such as Dipesh Parmar can immensely boost your confidence and improve your clinical knowledge. Given adequate studying and practice it will only be a matter of time before you can ensure your patients walk out of their appointments with long-lasting results.
› DIG DEEPER ‹
![]()
» Training
To become an Enlighten Whitening Expert and get CPD certified for free hit the button below to take our hour-long online training.
» eBooks
Learn how to dramatically increase the number of whitening treatments you do here.
» Websites
Or if you’re interested in knowing more about the Enlighten Teeth Whitening System, then give it a click right here.
![]()
» eBooks
Read up on the 6 tips that will perfect your anterior resin restorations here.
And to discover how you can achieve the aesthetic results you want when doing a single veneer with a single shade of composite, click here.
» Websites
If you want to learn more about the 2-day hands-on anterior composite masterclass with Dr Dipesh Parmar, click here.
» Podcast
Learn how to emulate the success of the movers and shakers in the dental industry from their own mouths, featuring the nuggets of knowledge from likes of Simon Chard, Andrew Moore, Tif Qureshi, Mark Hughes and many more.