


The Importance of Clinical Photography
Dr Kunal Desai speaks on the art of clinical photography and how it can boost the way you practice dentistry.
Clinical photography is becoming a vital aspect of dentistry, are you taking full advantage of it?
How it all began
I have always had an interest in photography from a young age, from the time I received my first digital canon camera for a holiday to my inherited DSLR now. Photography is so important to capture life’s moments as a snapshot in time for memories to look back on, similarly we can use photography in dentistry.
It should not take more than 3-4 minutes to take a full series of photos.
Dental photography is becoming the norm for modern day dentistry. Most people believe that taking photos is time consuming and there is no place for this in a busy practice, however learning to take the necessary photos and continually practising enables you to become quicker. Once you have your set up, photography accessories e.g. mirror/cheek retractor/ contraster and, your nurse has been trained to assist you it should not take more than 3-4 minutes to take a full series of photos.
When I first started dentistry I changed an amalgam restoration to a composite and then showed the patient whilst asking ‘do you remember what your tooth was like before?’. With them always shaking their head and saying no, then trying to explain what it looked like before and struggling to show them the new tooth in a mirror. It became pointless after a while. At the front of the mouth changes can be easily seen – but how noticeable is a lower left 7 composite?
It took me a while to stop being lazy and start taking photos, first with a small digital camera – I would only take photos of anterior restorations, and would shy away from taking posterior occlusal photos as I a) didn’t know how b) was too lazy to try c) could never get the lighting or positioning consistent. But what I failed to realise is that I just needed a basic camera and flash set up, an introral mirror and a retractor. Then the rest would come with practice.
Why is dental photography integral to dentistry today?
- Communication with the lab
- Documentation of your work
- Critical appraisal
- Educating patients
- Practice and Self-Marketing/ Portfolios
- Lecturing
- Referrals
- Treatment Planning
- Monitoring of conditions
What equipment do you need to take good clinical photos?
- DSLR Camera body e.g Canon, Nikon
- Macro lens (100mm/ 60mm)
- Light source: Ring flash/twin flash (owl bracket)
- Cheek Retractors
- Flexible Contrasters
- Mirrors: buccal and occlusal
- Advanced: cross polarising filter, bouncers
- SD card/ WiFi enabled SD card
How does clinical photography improve your dentistry?
I am a firm believer in learning from what you do, whether it be from mistakes or not, there is always room for improvement and the capacity to develop. As modern-day dentists this is key to providing an excellent standard of care.
Taking good clinical photos of your work enables you to reflect on cases and treatments you have done. Just as you would grade and assess a post-operative radiograph of your root canal treatment; a similar ethos can be applied to clinical photos. Taking a good pre-operative clinical photo and then from the same angle a post-operative photo you are able to see faults and areas that need adjusting or improving. For example, a bit of flash left after a posterior composite, or corrections to line angles when finishing an anterior composite. These tiny details are sometimes missed by the naked eye even under loupes, but macro photography is unforgiving and makes these tiny details stand out.
These minute changes to your work make the biggest of differences. This process allows you to learn and develop and when reproducing similar work, you find these issues earlier and address them which makes your working time more efficient and the quality of your work much better. You are thus able to produce more predictable outcomes for your patients.
Appraising your work
Critically appraising your work also allows you to look back and see how much you have improved. Reflecting on work done is a key part of any dentists’ continual development. Its amazing how when we have completed that filling, we sit back and admire it at that time. However, when we look back at it a few years later we realise how imperfect certain things were. Whether its because those line angles were slightly wrong, or the shade wasn’t quite correct, or the marginal ridge was too flat.
For many years now I have been lucky enough to have a good base of friends and like-minded colleagues to which I can send my work for further appraisal and recommendations. It is key to have this set up as sometimes you may not notice something others may. Furthermore, having a mentor to show your work to for appraisal and advice is key. As a young dentist being open to constructive criticism and treating it as tips for improving is essential to enhancing your skills.
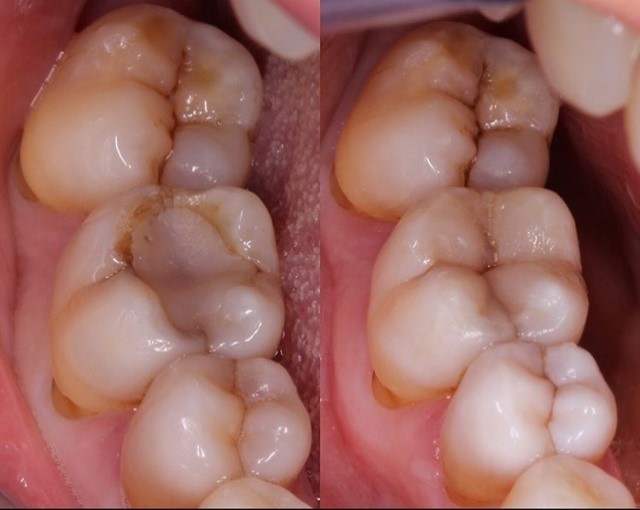
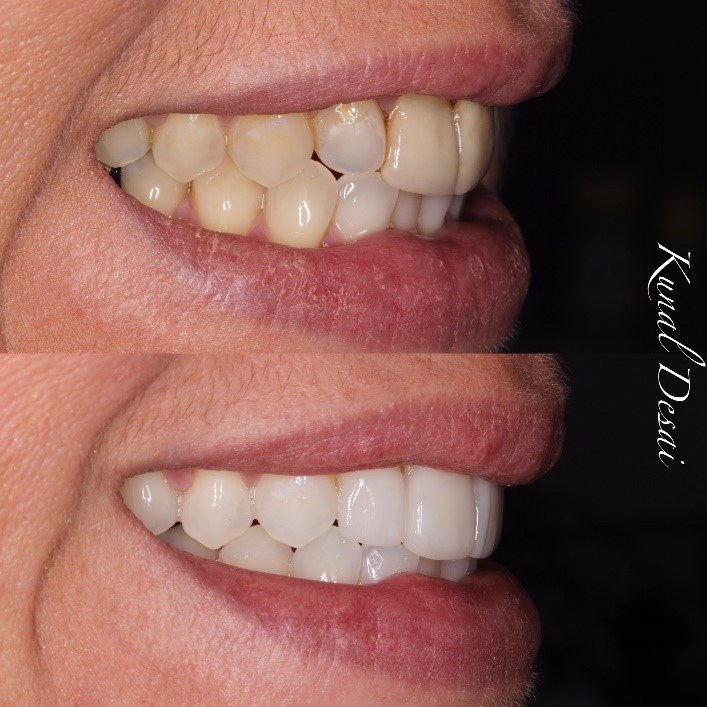
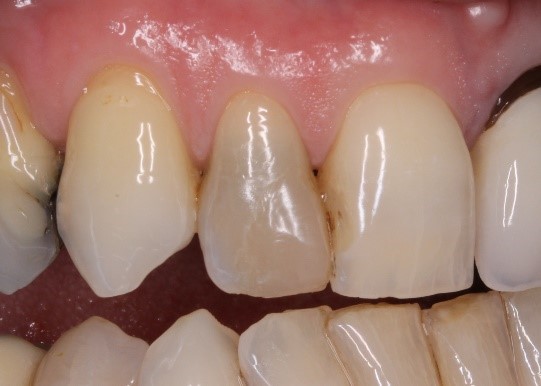
The above posterior composite photos were not taken with a mirror and thus we cannot see the tooth from the occlusal view, taken directly by using a cheek retractor. These photos were taken to demonstrate the anatomy of the restorations. You can see how the first composite restoration has fairly flat cuspal inclinations whereas the second more recent restoration is more tooth like with aesthetic rounded inclinations and also some fissure staining to match the existing teeth. It was a friend of mine that had mentioned to me about the inclinations and more rounder cusps and that I was perhaps making them too flat. I took this on board and practised creating more natural looking restorations. By taking photos from a different angle like this allows you to assess your cases in more detail and always try to improve. Furthermore it is a great way to show the detail in your work.
The importance of educating your patients
Taking these before and after pictures and showing the patient is priceless as dental issues do not always present with pain, for example a failing composite or a large amalgam with ditched margins and enamel/dentine fractures. I like to show my patients issues they have that they are not aware of and then show them after I have treated them. This is a great way of building a relationship with the patient and making them understand procedures and techniques. Furthermore simply showing a patient an occuslal photo of their teeth makes them see exactly what they have – this is normally a trigger to them to want to make some changes. Most patients will ask – is that in my mouth? Are those my teeth? And this normally leads to an uptake in treatment and also improved oral hygiene.
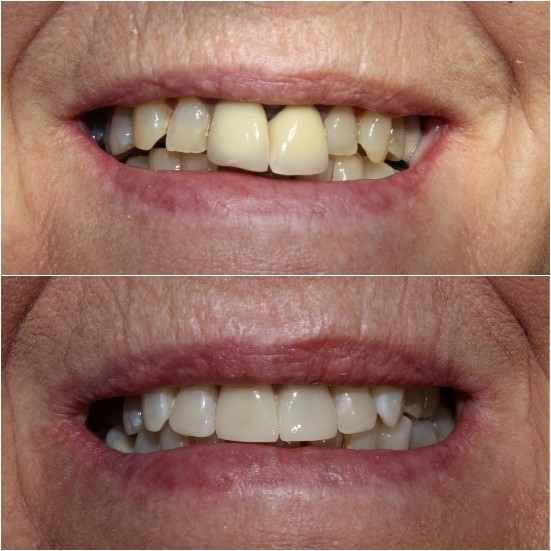
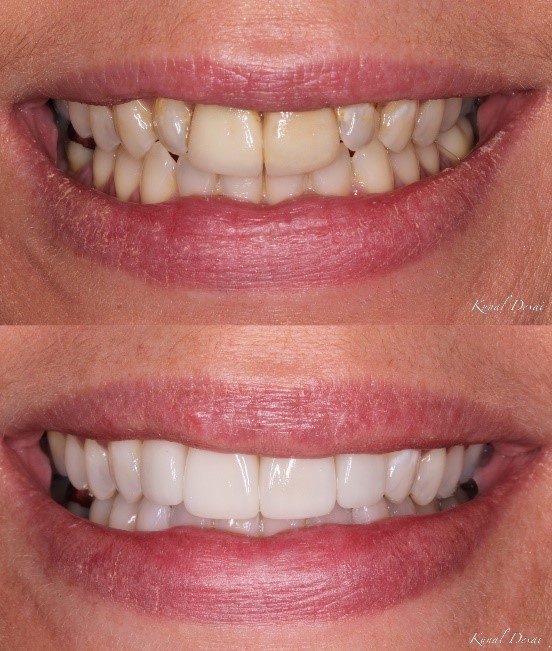
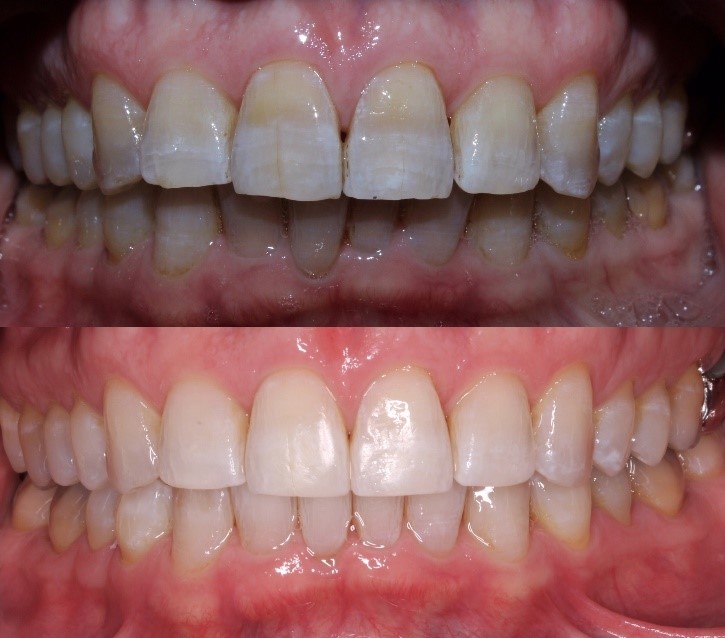
Before and after of a replacement crowns and direct composite veneers case.
The above photo (pre op)–Although taken without a macro lens, a ringflash or twinflash; is able to portray to the patient her smile and unaesthetic looking crowns, which do not suit the patient nor the adjacent teeth. the angle and focal point of the photo not parallel with the patient ie not parallel to the occlusal plane – taken from below the occlusal plane. The below photo (post op) – the positioning and focal point are better but the lighting is not. Therefore, there is a difference in the consistency of the photos, making it difficult to correctly assess and reflect on the case.
Although these differences are not noticeable to the patient they can make a big difference in outcomes. This illustrates the importance of good reproducible lighting and consistent positioning.
Reflecting on work done is a key part of any dentists’ continual development
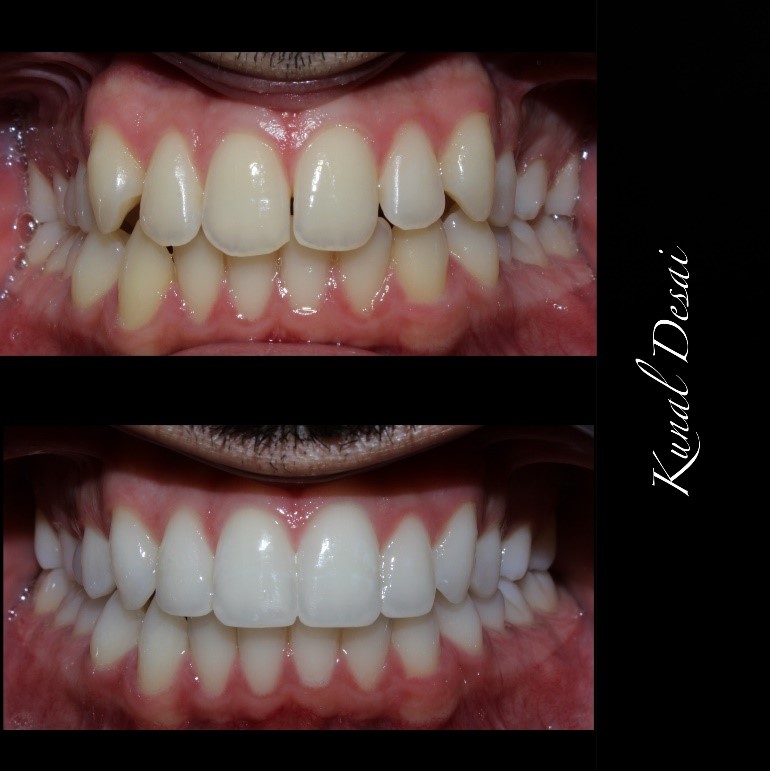
This case was my first smile makeover case which I learned greatly from by taking pre and post op photos. It also highlighted to me the need for smile design planning which I have now started doing by the means of direct chair-side mock ups using composite, trial smiles based upon lab wax ups and also digital mock ups.
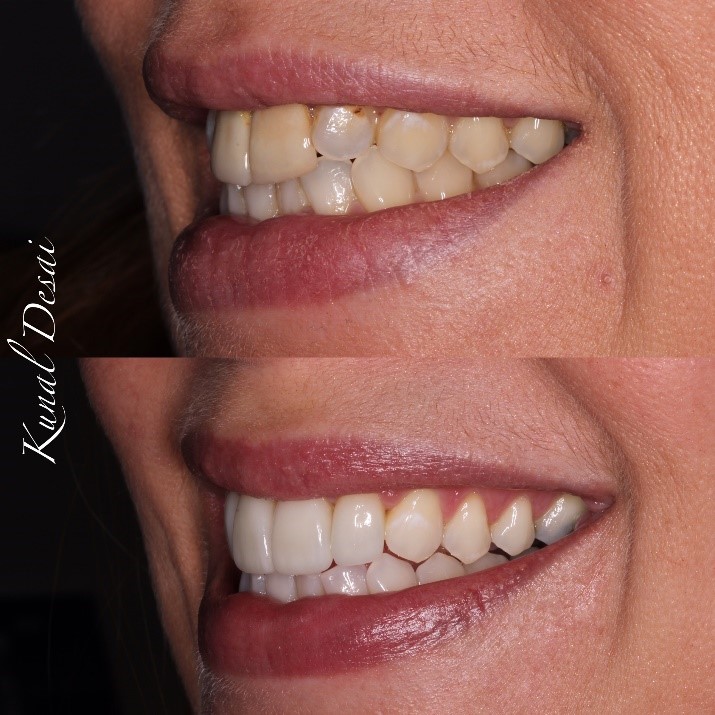
Before and After: Tooth whitening and 4 minimal preparation veneers (2019).
This case is a more recent smile makeover. In comparison to the above example both photos taken with a macro lens and a ringflash; producing more accurate photos with similar lighting for both photos. This makes it easier for us to plan and assess the case.
Photos of the patient smiling are a great way for patients to see their smile close up. it also allows us to assess their smile, and plan to improve it. In this case I used a chair-side mock up: placing composite on the lateral incisors to mask the rotation and incisal height, and distal of the central incisors incisal edges to make the front teeth less triangular.
I have also found it useful to show patients side profile smile shots and then retracted intraoral straight on photos with the focus on the laterals.
Above are some useful side smile photos to take to show the patient what others may see when smiling, or what photos may look like when the patient is smiling.
Before tooth whitening shade A2
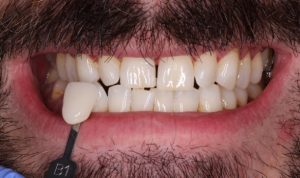
After tooth whitening shade B1
Simple photos can be taken of the patient’s smile for tooth whitening, additionally retracted photos can also be taken. Above are before and after photos with vita shade tabs to illustrate the change in colour. These photos are simple and quick to take and are very useful to show patients the initial and the new colour of their teeth. I like to have my Vita shade guide set up in colour order from whitest to darkest. Here the only thing that is important is capturing the same position – in line with the occlusal plane and capturing the smile. Presenting the pictures side by side or one above another shows the difference more easily. This can be done using several applications eg. Collage maker. For example, if we look at the below cases:
Before and after: Invisalign, whitening and composite bonding. You can see the first photo shows a contrasting result – both photos were taken without a ringflash. You can see the shadows that appear in the photos at the back of the mouth and under the lip. Again these differences can be seen in the below photos. The aftert photos taken with a ringflash – no shadows present.
Communication with the Lab
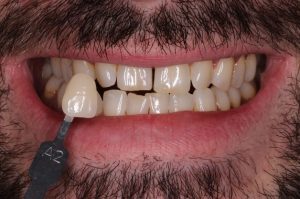
Taking accurate and consistent photos of teeth before preparations and after preparations of the teeth with a few shade tabs is key. This is essential to show the lab what you are trying to replicate. Shade matching and mapping can sometimes be tricky and producing good quality photos to your lab will help overcome some of the mapping difficulties. Examples: halos, translucencies, opacities, cracks/staining, size and anatomy.
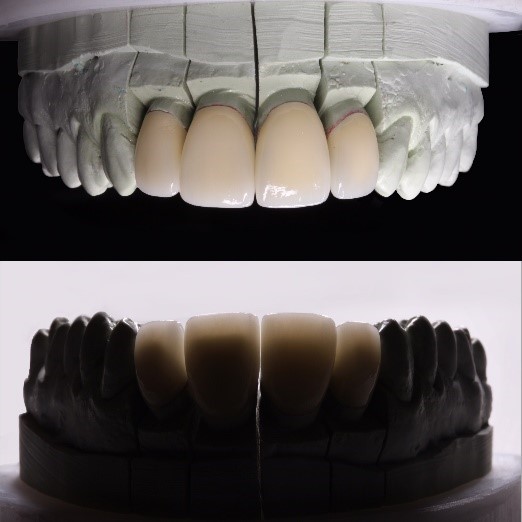
Taking pictures of your models and lab work before and after fit is important to help educate your lab and help improve their work also. When the lab know that their work is being showcased it helps them evaluate their work and achieve great aesthetic results.
I try and ask my lab technicians for feedback on preparations, this is something you need to do if you are not doing already. Sometimes, the blame is placed on our technicians when our preparations, impressions or information haven’t helped them. You can clearly see your preparations on the models and see areas that may need improving in either preparations of impressions. For example – smoothness, airblows, undercuts and sharp angles. Photographing your impressions and models shows these up more clearly and enables you to recognise potential issues.

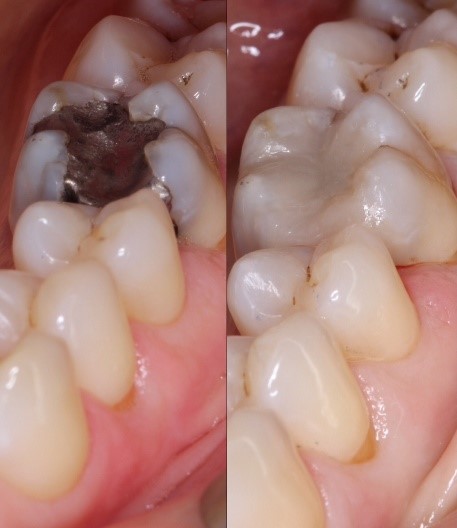
Top to Bottom: Pre op situation; dark tooth after root canal, large composite. Second picture with blackout contraster. Post op crown fit with blackout contraster.
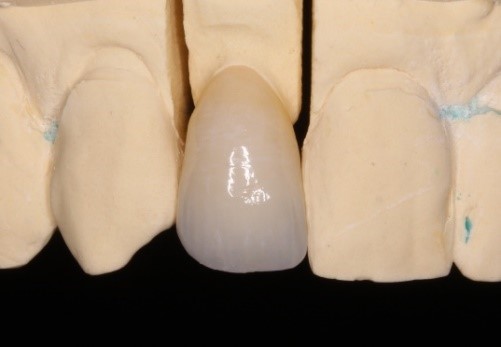
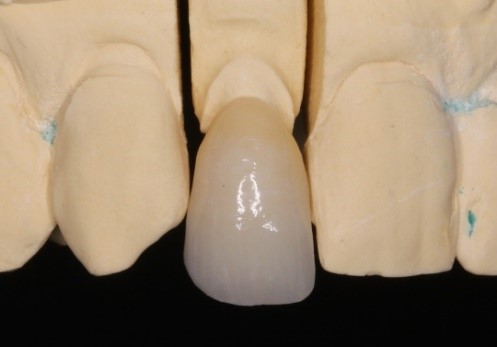
Emax crown on model. Emax crown and model showing gingival margin integration. Lab work created by Pictodent Dental Lab.
Lab work showing 4 veneers on the model. Above the blackout technique and below the whitewash technique. The below photo is taken to show the translucency of the veneers. This is a great way to show your creative photography and showcase work at the same time.
Recommended hands on photography course: F:OCUS by Minesh Patel – advanced techniques are taught on this course and is a must for all dentists.
What is the most important thing in photography?
Simplicity, consistency and reproducibility are the key to taking good clinical or artistic photos and taking your dentistry to the next level.
Top tips for everyday clinical photography:
- Gain written and verbal consent for your photos – check GDC regulations for posting on social media
- Keep it simple and aim for consistent photos, shooting from consistent positions and using the same focus points
- Educate your nurse and be prepared: Make sure all batteries are fully charged. Have all mirrors, retractors and contractors ready. Make sure your mirrors are heated in a water bath (can use alginate bowl) so they don’t steam up. If they do steam up get your nurse to blow the air from the 3 in 1 onto the mirror whilst it is in position.
- For flash batteries: buy rechargeable batteries and a charger unit
- Ensure the object you are taking a photo of is dry – tissue/ 3 in 1
- Apply Vaseline to patients lips to help make retraction more comfortable – or ask them to lick their lips
- Get the patient to retract their own lips and cheeks once you have positioned the retractors – and direct them if you need to adjust them
- Use buccal mirrors for posterior photos, occlusal mirrors for full arch photos
- Remember what settings you took the original photo, so when you take the post-operative photo you can change settings to this to have that important consistency. Can be recorded in the patient notes.
- Buy a few mirrors and retractors as you may have back to back cases.
- Keep taking photos as you will get better and also become quicker at taking them.
- Most importantly look back on your photos and cases and learn from them.
Good sources for buying materials and equipment: Amazon, Photomed, UKdentistry, Optident.
› DIG DEEPER ‹
![]()
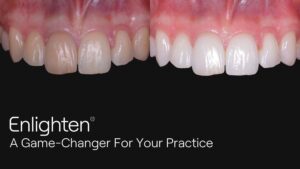
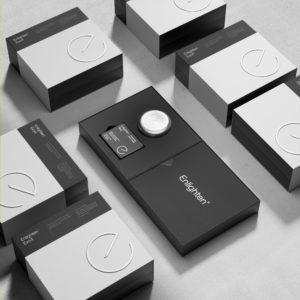
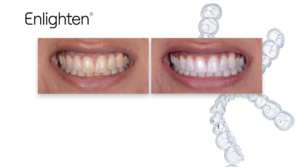
» Training
To become an Enlighten Whitening Expert and get CPD certified for free hit the button below to take our hour-long online training.
» eBooks
Learn how to dramatically increase the number of whitening treatments you do here.
» Websites
Or if you’re interested in knowing more about the Enlighten Teeth Whitening System, then give it a click right here.
![]()
» eBooks
Read up on the 6 tips that will perfect your anterior resin restorations here.
And to discover how you can achieve the aesthetic results you want when doing a single veneer with a single shade of composite, click here.
» Websites
If you want to learn more about the 2-day hands-on anterior composite masterclass with Dr Dipesh Parmar, click here.
» Podcast
Learn how to emulate the success of the movers and shakers in the dental industry from their own mouths, featuring the nuggets of knowledge from likes of Simon Chard, Andrew Moore, Tif Qureshi, Mark Hughes and many more.